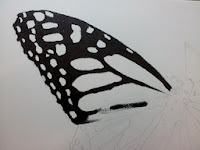
 This post follows the work I talked about in the last post. I blocked in the black areas and a quick impression of the foliage. For the foliage, I used sap green, yellow light, white, and some of the black to mix for shady green.
 Amazing how adding the sky background adds so much to the painting. This was a mix of cerelean blue tinted with titanium white. I used a small flat brush to block in the sky next to busy spots and a larger flat to cover the rest of the canvas including the edges.
 Here the painting is shown with the completed sky hanging from a short wire I put on it for easier handling while it is wet.
The next step will be to add the beautiful color to the wings and body. I could have done more to this one today, but had a broken chainsaw that also needed fixing.
The other butterfly painting will be more of a challenge as the background has beautiful flowers for him to feed on. I will work on him tomorrow. Your comments are welcome.
Let us pray before we paint,
jimmie@jimmiesart.com


